![[SOLVED] CSIS 310 MINDTAP SLATE & PENCIL TUTORING: Karen Cooke manages the website for Slate & Pencil Tutoring, an online tutoring service for high school and college students.](https://grademerit.com/wp-content/uploads/edd/2023/12/Screenshot-2023-12-19-072115-1.png)
[SOLVED] CSIS 310 MINDTAP SLATE & PENCIL TUTORING: Karen Cooke manages the website for Slate & Pencil Tutoring, an online tutoring service for high school and college students. Karen is overseeing the redesign of the website and has hired you to work on the layout of the site’s home page.
[SOLVED] CSIS 310 MINDTAP SLATE & PENCIL TUTORING: The image above shows a preview of the company’s home page that you’ll create.
The style sheets and graphic files have already been created for you. Your job is to write the HTML markup.
[SOLVED] CSIS 310 MINDTAP SLATE & PENCIL TUTORING: Instructions
This Case Problem contains interactive instructions that you can complete to ensure you’ve completed the instruction correctly.
After reading each instruction thoroughly, perform the requested change in the code editor to the right. You can use the Build Website button to refresh your website preview at any point and view a full-page version of your website by clicking the arrow in the top right corner of your website preview.
After you’ve completed an instruction, click the corresponding check box in your list of instructions. This will trigger simulated tests of your website to ensure that you successfully completed the instruction.
Document Setup
Adding Links
Enter your name and the date in the comment section of both sp_home.html and sp_layout.css
Go to the sp_home.html file. Within the document head, create links to the sp_base.css, sp_styles.css, and sp_layout.css style sheet files. Study the content and structure of the file.
—
CSS Styles
Body Styles
Go to the sp_layout.css file and then to the Window and Body Styles section. Create a style rule for the html element that sets the height of the browser window at 100%.
Create a style rule for the page body that sets the width to 95% of the browser window ranging from 640 pixels up to 960 pixels. Horizontally center the page body within the browser window. Finally, Karen wants to ensure that the height of the page body is always at least as high as the browser window itself. Set the minimum height of the browser window to 100%.
Create a style rule to apply the Border Box model to all header, ul, nav, li, and a elements in the document.
Row & Page Header Styles
Go to the Row Styles section. Karen has placed all elements that should be treated as grid rows in the row class. For every element of the row class, create a style rule that expands the element to cover any floating content within the element. (Hint: Use the technique shown in the tutorial that employs the after pseudo-element.)
Go to the Page Header Styles section. In this section, you will create styles for the content of the body header. Create a style rule for the logo image within the body header that displays the image as a block with a width of 70% of the header, floated on the left margin.
The header also contains a navigation list that Karen wants to display vertically. Create a style rule for the nav element within the body header that:
The hypertext links in the navigation list should be displayed as blocks. Create a style rule for every a element in the header navigation list that displays the element as a block with a width of 100%.
Horizontal Navigation List Styles
Go to the Horizontal Navigation List Styles section. Karen has added a second navigation list that she wants to display horizontally. For all list items within the horizontal navigation list, create a style rule that displays the items as blocks with a width of 12.5% floated on the left margin.
HR Styles
Go to the HR Styles section. The hr element is used to display a horizontal divider between sections of the page. Add a style rule that sets the width of the hr element to 50%.
Footer Styles
Go to the Footer Styles section and create a style rule that displays the footer only when both margins are clear of floating objects.
Topics Styles
Go to the Topics Styles section. This section sets the styles for a list of four topics describing what the company is offering. Karen wants this list to also be displayed horizontally on the page. For list items within the ul element with the id topics, create a style rule to:
Karen wants the topics list to be well away from the left and right edges of the page body. In the same section, create a rule that sets the size of the left margin of the first item in the topics list to 7.75% and sets the right margin of the last item to 7.75%.
In the same section, create a rule that displays the image within each list item in the topics list as a block with a width of 50% and centered within the list item block.
(Hint: Set the left and right margins to auto.)
Comment Styles
Go to the Customer Comment Styles section. In this section, you will create style rules for the customer comments displayed near the bottom of the page. For the ul element with the id comments, create a style rule that sets the width to 75% and centers the element by setting the top/bottom margin to 40 pixels and the left/right margin to auto.
Karen wants the list items to appear in two columns on the page. In the same section, create a style rule for every list item in the comments list that:
Every customer comment is accompanied by an image of the student. Karen wants these images displayed to the left of the comment. Create a style rule to display the image within each comment list item as a block with a width of 20%, floated on the left, and with a left/right margin of 5%.
Create a style rule for every paragraph nested within a customer list item that floats the paragraph on the left margin with a width of 70%.
Verify
Open the sp_home.html file and click the green Build Website button at the bottom of the window. Verify that the layout and design styles resembles the finished website shown in the Introduction step.
FILES
sp_base.css
@charset “utf-8”;
/*
New Perspectives on HTML5 and CSS3, 7th Edition
Tutorial 3
Case Problem 1
Base Style Sheet for the Slate & Pencil Website
Filename: sp_base.css
*/
article, aside, figcaption, figure,
footer, header, main, nav, section {
display: block;
}
address, article, aside, blockquote, body, cite,
div, dl, dt, dd, em, figcaption, figure, footer,
h1, h2, h3, h4, h5, h6, header, html, img,
li, main, nav, ol, p, section, span, ul {
margin: 0;
padding: 0;
border: 0;
font-size: 100%;
vertical-align: baseline;
background: transparent;
}
nav ul {
list-style: none;
list-style-image: none;
}
nav a {
text-decoration: none;
}
body {
line-height: 1;
}
sp_home.html
<!DOCTYPE html>
<html>
<head>
<!–
New Perspectives on HTML5 and CSS3, 7th Edition
Tutorial 3
Case Problem 1
Slate & Pencil Home Page
Author:
Date:
Filename: sp_home.html
–>
<meta charset=”utf-8″ />
<title>Slate & Pencil Tutoring</title>
</head>
<body>
<header class=”row”>
<img src=”sp_logo.png” alt=”Slate & Pencil Tutoring” />
<nav>
<ul>
<li><a href=”#”>Home</a></li>
<li><a href=”#”>Our Tutors</a></li>
<li><a href=”#”>Pricing</a></li>
<li><a href=”#”>Testimonials</a></li>
<li><a href=”#”>Your Account</a></li>
<li><a href=”#”>Chat Online</a></li>
</ul>
</nav>
</header>
<nav class=”horizontal”>
<ul class=”row”>
<li><a href=”#”>Math</a></li>
<li><a href=”#”>Science</a></li>
<li><a href=”#”>English</a></li>
<li><a href=”#”>Languages</a></li>
<li><a href=”#”>History</a></li>
<li><a href=”#”>Sociology</a></li>
<li><a href=”#”>Art</a></li>
<li><a href=”#”>Other</a></li>
</ul>
</nav>
<ul id=”topics” class=”row”>
<li><img src=”sp_topic1.png” alt=”” />
<p>Our tutors have advanced degrees, supplemented with real-world
experience to help you meet your education goals.</p>
</li>
<li><img src=”sp_topic2.png” alt=”” />
<p>Every session is just you and your instructor and
there is always someone online to help you. 24/7.</p>
</li>
<li><img src=”sp_topic3.png” alt=”” />
<p>We cover it all: From from Biochemistry to
Beethoven. We can also help you prep for the ACT, SAT, and AP
exams.</p>
</li>
<li><img src=”sp_topic4.png” alt=”” />
<p>We keep our prices low. Sign up for one-time assistance or enroll
for a full semester at greatly reduced rates.</p>
</li>
</ul>
<hr />
<ul id=”comments”>
<li><img src=”sp_student1.png” alt=”” />
<p>“Thanks to <em>Slate & Pencil</em> I passed AP Calculus
with a 5.”<br />
<br />
— Kevin, 12th Grade, Utah</p>
</li>
<li><img src=”sp_student2.png” alt=”” />
<p>“I use <em>Slate & Pencil</em> all of the time to
supplement my lectures and course notes.”<br />
<br />
— Paul, 12th Grade, Texas</p>
</li>
<li><img src=”sp_student3.png” alt=”” />
<p>“I’m making the honor roll for the first time thanks to
your wonderful service and help!”<br />
<br />
— Lisa, 11th Grade, Florida</p>
</li>
<li><img src=”sp_student4.png” alt=”” />
<p>“Geometry is a breeze after working online with your great
tutors and review materials.”<br />
<br />
— Karen, 9th Grade, Nebraska</p>
</li>
<li><img src=”sp_student5.png” alt=”” />
<p>“I’ve seen a great improvement in my use of study time and
I retain more than ever before.”<br />
<br />
— Gianna, 10th Grade, Vermont</p>
</li>
<li><img src=”sp_student6.png” alt=”” />
<p>“After using <em>Slate & Pencil</em>, my SAT and ACT
scores went through the roof!!!”<br />
<br />
— Todd, 11th Grade, Illinois</p>
</li>
</ul>
<footer>
Slate & Pencil Tutoring; © 2017 All Rights Reserved
</footer>
</body>
</html>
sp_layout.css
@charset “utf-8”;
/*
New Perspectives on HTML5 and CSS3, 7th Edition
Tutorial 3
Case Problem 1
Layout styles for Slate and Pencil Tutoring
Author:
Date:
Filename: sp_layout.css
*/
/* Window and Body Styles */
/* Row Styles */
/* Page Header Styles */
/* Horizontal Navigation List Styles */
/* Topics Styles */
/* HR Styles */
/* Customer Comment Styles */
/* Footer Styles */
sp_logo.png
sp_student1.png
sp_student2.png
sp_student3.png
sp_student4.png
sp_student5.png
sp_student6.png
sp_styles.css
@charset “utf-8”;
/*
New Perspectives on HTML5 and CSS3, 7th Edition
Tutorial 3
Case Problem 1
Typographical styles for Slate and Pencil Tutoring
Filename: sp_styles.css
*/
/* Window and Body Styles */
html {
background-color: rgb(230, 182, 144);
}
body {
background-color: rgb(250, 238, 218);
font-family: Verdana, Geneva, Arial, sans-serif;
}
/* Page Header Styles */
body > header {
background-color: rgb(61, 138, 216);
}
body > header > nav a {
font-size: 1em;
margin: 0.4em 0;
padding: 5px;
}
body > header > nav a:link, body > header > nav:visited {
color: rgb(250, 238, 218);
}
body > header > nav a:hover, body > header > nav:active {
background-color: rgba(0, 0, 0, 0.2);
}
/* Horizontal Navigation List Styles */
nav.horizontal ul li {
background-color: rgb(18, 31, 102);
font-size: 0.9em;
padding: 10px 0;
text-align: center;
}
nav.horizontal a:link, nav.horizontal a:visited {
color: rgb(250, 238, 218);
}
nav.horizontal a:hover, nav.horizontal a:active {
color: rgb(255, 255, 64);
}
/* Topics Styles */
ul#topics {
margin-top: 20px;
margin-bottom: 20px;
}
ul#topics li p {
color: rgb(95, 114, 232);
font-size: 0.8em;
}
/* Customer Comment Styles */
ul#comments li p {
font-size: 0.9em;
color: rgb(121, 121, 121);
line-height: 1.2em;
}
/* Footer Styles */
footer {
color: rgb(186, 186, 156);
background-color: rgb(44, 91, 169);
font-size: 0.9em;
padding: 10px 0px;
text-align: center;
}
sp_topic1.png
sp_topic2.png
sp_topic3.png
sp_topic4.png
Tasks:
![[SOLVED] CSIS 310 MINDTAP ACGIP CONFERENCE PROFESSOR DARSHAN BANERJEE: ACGIP Conference Professor Darshan Banerjee is the project coordinator for the annual conference of the Association of Computer Graphics and Image Processing (ACGIP),](https://grademerit.com/wp-content/uploads/edd/2023/12/Screenshot-2023-12-19-073554.png)
[SOLVED] CSIS 310 MINDTAP ACGIP CONFERENCE PROFESSOR DARSHAN BANERJEE: ACGIP Conference Professor Darshan Banerjee is the project coordinator for the annual conference of the Association of Computer Graphics and Image Processing (ACGIP), which takes place this year in Sante Fe, New Mexico. Darshan has asked you to work on the conference’s website, starting with the registration form for conference attendees. The initial form will collect contact information for people attending the conference. The figure below shows a preview of the form you will create for Darshan.
![[SOLVED] CSIS 310 MINDTAP VOTER WEB: VoterWeb Pam Carls is a manager for the website Voter Web, which compiles voting totals and statistics from local and national elections.](https://grademerit.com/wp-content/uploads/edd/2023/12/Screenshot-2023-12-19-072115.png)
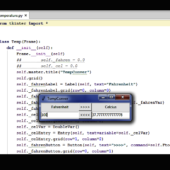
[SOLVED] CSIS 310 MINDTAP VOTER WEB: VoterWeb Pam Carls is a manager for the website Voter Web, which compiles voting totals and statistics from local and national elections. Pam has the results of recent congressional elections from eight districts in Minnesota stored as multidimensional arrays in a JavaScript file. Pam wants you to create a script displaying these results and calculating the vote percentage for each candidate within each race.
![[SOLVED] CSIS 310 MINDTAP STAR DUST STORIES: Star Dust Stories | Dr. Andrew Weiss of Thomas & Lee College maintains an astronomy page called Star Dust Stories. One of the tools of the amateur stargazer is a planisphere, which is a handheld device composed of two flat disks:](https://grademerit.com/wp-content/uploads/edd/2023/12/Screenshot-2023-12-19-070846.png)
[SOLVED] CSIS 310 MINDTAP STAR DUST STORIES: Star Dust Stories | Dr. Andrew Weiss of Thomas & Lee College maintains an astronomy page called Star Dust Stories. One of the tools of the amateur stargazer is a planisphere, which is a handheld device composed of two flat disks: